Showing posts with label Our Home. Show all posts

Organization Tips: Craft Room Closet


I recently decided to organize the closet in my craft room.  As you can see from the picture below, it was in some serious need of TLC.  I have a lot of craft supplies from scrap book paper, paints/brushes, ribbons, tissue paper, fabric, and pretty much anything else you can think of.  It got to the point where it was difficult to find things and I could barely open the door without being afraid of the potential avalanche of items.


I decided to begin the daunting task of organizing it and I am so glad I did! It is so much easier to find things as I need them and it even looks pretty.  I don't know about you, but when it definitely inspires me more when things actually look appealing around me.  I decided to compile a couple of tips to help you in case you are faced with the same problem. 


1. Don't be afraid of downsizing- I got rid of a trash bag worth of old supplies.  If you have not used something in over 6 months and don't have plans to do so, then throw it away. You can also donate to a local charity if the items are in good shape.

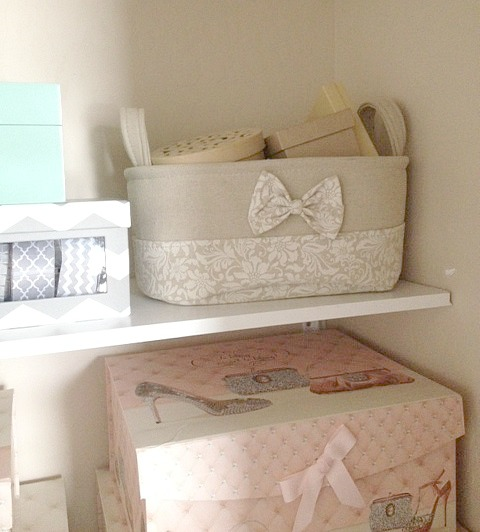
2. Purchase pretty storage bins- Storage bins can be life savers, but just make sure you aren't transferring the mess from one space to another.  If it helps, you can purchase some labels to help you remember what is inside each one.

3. Make it functional based on your own needs- The top shelves in my closet are pretty high, so I use them for the items that I don't use as often.  Also, I try not to stack boxes too high, so that  the ones in the middle are easy to get to. 

4. Set aside some time and space- Overall this took about 3 hours total (I literally went through everything lol).  I also used all of the available floor space in my craft room to lay everything out and wrap my brain around all of the things I have.

5. Enlist help- This is much more fun done with a buddy, or in my case a boyfriend who is not afraid to tell me I have not used something in years.  Talk about a gut check when contemplating whether or not to get rid of something!

I hope these tips were helpful for you! Have a great weekend!

Gallery Wall: Tips and Tricks


As many of you may know, I have a slight obsession with gallery walls.  They are my default decorating tip when trying to fill up a bare wall.  One of the reasons I love them so much is the fact that they are so diverse and no one gallery wall is the same.  In this post I'll be sharing some tips and tricks on how to make your very own gallery wall. 
 
 
1. Decide on a Design
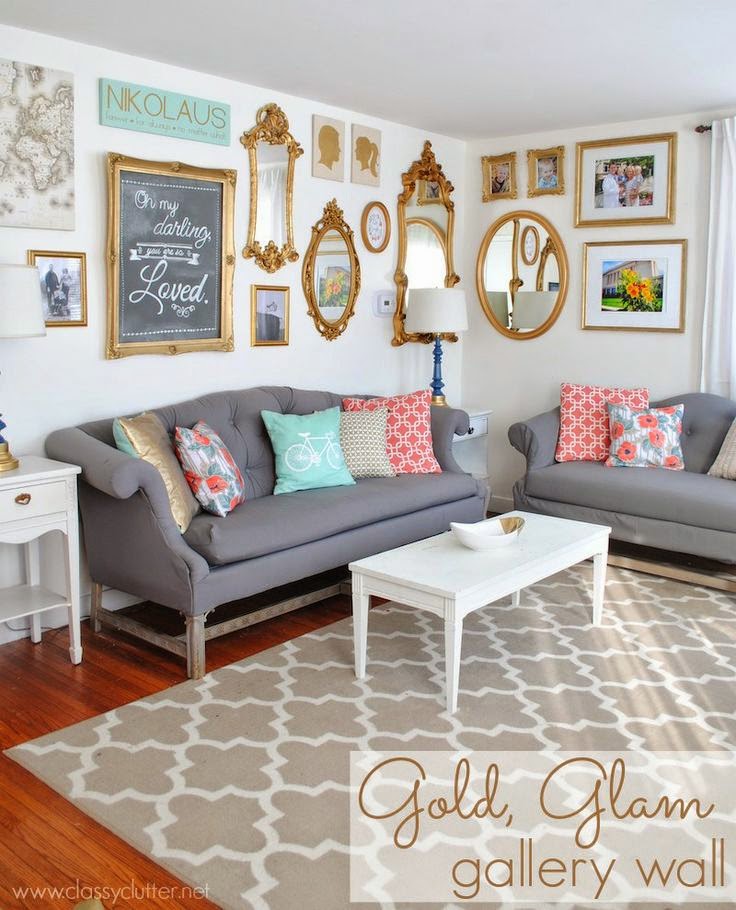
There are so many different varieties of gallery walls, so first try and narrow down the type of style you want.  Decide if you want something completely symmetrical, same color or different color frames, mixed media, layered, on a grid, etc. The gallery wall from the first pic is straight out of our living room and includes pics from our last trip to Europe. The plan is to use that wall to highlight pictures from our future trips.  Pinterest is a great source of inspiration if you are drawing a blank. I've also posted a few pics of the gallery walls I created in my own home, as well as some that I'm inspired by, throughout this post. 


2. Start Collecting the Materials
Keep in mind that this can potentially take some time depending on the design you choose.  If you decide to go the route of a mixed media collage you should constantly be on the lookout for that perfect piece to add to your gallery wall.  I have also purchased an item that I really loved and used that as a focal point in the gallery wall.  Don't be afraid of a little DIY in the event you don't find what you're looking for.  I painted a few of the frames in my craft room gallery wall, to get the exact look that I wanted. Remember that this doesn't have to be an expensive project.


3. Placing and Spacing
When you have all of your frames ready to go, it is now time to hang it up. The best tip on hanging up the wall is shown above.  Start by tracing the frames on the outside, using some left over craft or wrapping paper.  If you have an intricate frame or letter than consider tracing the inside as well and cutting around the design.  That way you will have a better visual of what it will look like when it's all done.  Next hang up the pieces in your desired placement using masking tape (painters tape also works well.)  From here you can re-arrange as needed. 
 
 
4. Have fun and Get Creative
Most importantly have fun with this project! The gallery wall should be a reflection of you and your own personal style, so don't be afraid to get creative and add some personal flavor to it.  The great thing is that you can continue to add to the design as you find more great pieces over time.


 I hope this was helpful and inspired you to get started on your very own gallery wall project.  If you have any questions at all, please don't hesitate to ask.
 
Thanks for stopping by!

Instagram Lately


Happy Sunday everyone! I hope you had a fabulous weekend!  I wanted to share some recent pics from my Instagram account.  Be sure to follow along here for a daily dose of inspiration and details on any upcoming giveaways for my shop. 
On a side note it has been super busy at work lately and I have had a hard time balancing work, the blog, my shop, plus any social media sites (yes that means I have had less time on Pinterest sadly enough). I was trying to be over eager with my shop and if someone placed an order, I would make the tassel that night and ship out the next day.  This was beginning to be too much and I found myself staying up late and being drained the next day.  I am now only focusing on the shop during the weekend, so we'll see if this alleviates some stress.  I have been such a slacker when it comes to working out lately, so I need to get back to it this week. 
Thanks for listening and have a great week!


Home Tour: Guest Bathroom


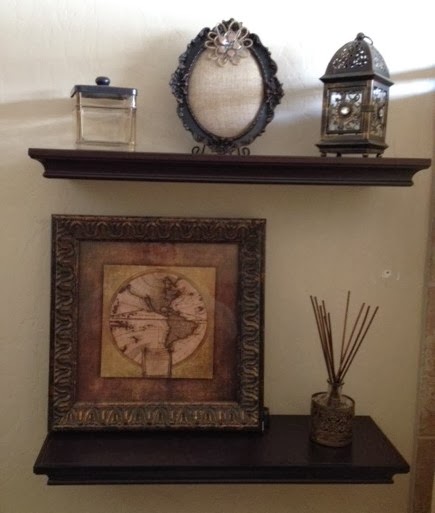
I hope you all had a great weekend! I wanted to continue the tour of my house and the next stop is the guest bathroom.  I recently made some changes to it, but unfortunately I did not take any before pictures.  The only thing new is the shelves and the styling on them.  When we purchased our house there was an additional towel bar over the toilet, but I knew I wanted to add shelves instead.  We finally got around to it and here is the end result.  We also added a towel ring next to the sink. 
 
The next step is to maybe paint the walls and definitely upgrade the mirror somehow.  I am thinking a DIY framing project with either molding or decorative tile.  Which do you think would look better?
 
Thanks for stopping by!

Home Tour: Guest Bedroom


Welcome back everyone! I hope you had a good week. Mine was pretty busy at work, so I am so grateful that the weekend is finally here.  

I wanted to share some more pics of our home, so my plan is to show one room at a time. We still have a lot to do, but I am happy with our progress so far. 

This is our guest bedroom and my goal here was to keep it neutral and calm. I love this comforter that I found online at kohls a while back. Next step is to hang up some art on the walls and add some curtains.  

I'll keep you posted on any changes, but thanks for stopping by for now!


Craft Room Reveal


Hi Everyone! Here is an updated version of my craft room/office....my favorite spot in the whole house. I hope you love it as much as I do!


Blogging tips