

As many of you may know, I have a slight obsession with gallery walls. They are my default decorating tip when trying to fill up a bare wall. One of the reasons I love them so much is the fact that they are so diverse and no one gallery wall is the same. In this post I'll be sharing some tips and tricks on how to make your very own gallery wall.

1. Decide on a Design
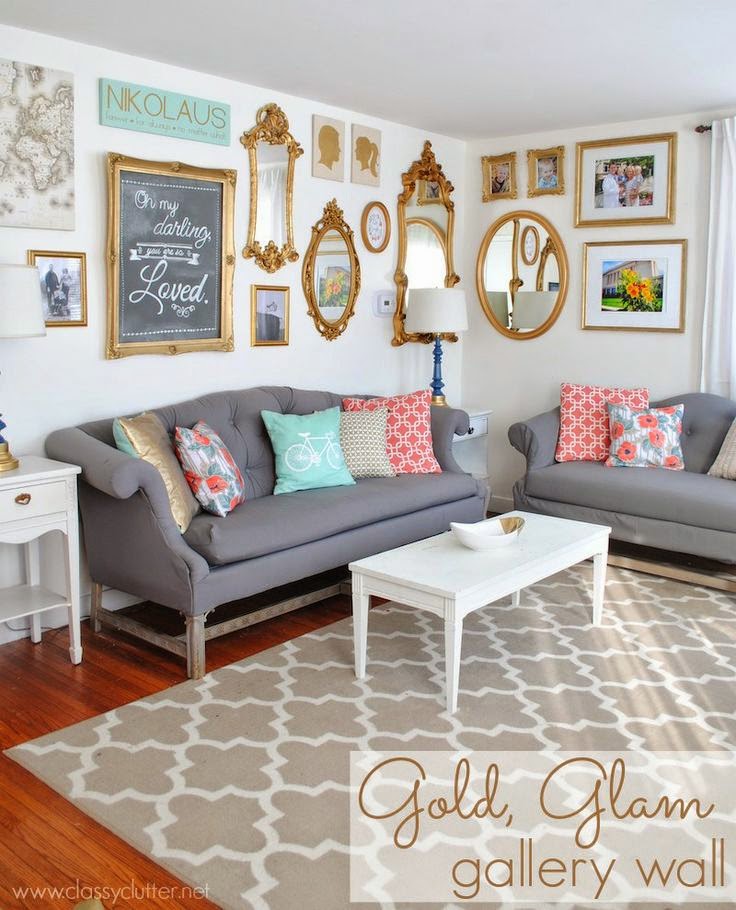
There are so many different varieties of gallery walls, so first try and narrow down the type of style you want. Decide if you want something completely symmetrical, same color or different color frames, mixed media, layered, on a grid, etc. The gallery wall from the first pic is straight out of our living room and includes pics from our last trip to Europe. The plan is to use that wall to highlight pictures from our future trips. Pinterest is a great source of inspiration if you are drawing a blank. I've also posted a few pics of the gallery walls I created in my own home, as well as some that I'm inspired by, throughout this post.

2. Start Collecting the Materials
Keep in mind that this can potentially take some time depending on the design you choose. If you decide to go the route of a mixed media collage you should constantly be on the lookout for that perfect piece to add to your gallery wall. I have also purchased an item that I really loved and used that as a focal point in the gallery wall. Don't be afraid of a little DIY in the event you don't find what you're looking for. I painted a few of the frames in my craft room gallery wall, to get the exact look that I wanted. Remember that this doesn't have to be an expensive project.


3. Placing and Spacing
When you have all of your frames ready to go, it is now time to hang it up. The best tip on hanging up the wall is shown above. Start by tracing the frames on the outside, using some left over craft or wrapping paper. If you have an intricate frame or letter than consider tracing the inside as well and cutting around the design. That way you will have a better visual of what it will look like when it's all done. Next hang up the pieces in your desired placement using masking tape (painters tape also works well.) From here you can re-arrange as needed.

4. Have fun and Get Creative
Most importantly have fun with this project! The gallery wall should be a reflection of you and your own personal style, so don't be afraid to get creative and add some personal flavor to it. The great thing is that you can continue to add to the design as you find more great pieces over time.
I hope this was helpful and inspired you to get started on your very own gallery wall project. If you have any questions at all, please don't hesitate to ask.
Thanks for stopping by!


I recently started my own mini gallery wall and I love it. It's not fancy or anything that I'd put up in my living room bur it looks great over my work station. I use gold glitter tape to hang my pictures rather than frames to fit my more organic/DIY personality. I picked a simple design and just line them up in rows of four adding upwards as I go. Hopefully I'll be able to have a wall full of pretty pictures by this time next year :)
ReplyDeleteMunachi
GlamorousRevelation.blogspot.com
That sounds so pretty! Do you have any pics of it on your IG account? What a great idea to use the glitter tape to add some extra sparkle! :)
Delete